
+86 18116360585
- Chinese
- French
- German
- Portuguese
- Spanish
- Russian
- Japanese
- Korean
- Arabic
- Irish
- Greek
- Turkish
- Italian
- Danish
- Romanian
- Indonesian
- Czech
- Afrikaans
- Swedish
- Polish
- Basque
- Catalan
- Esperanto
- Hindi
- Lao
- Albanian
- Amharic
- Armenian
- Azerbaijani
- Belarusian
- Bengali
- Bosnian
- Bulgarian
- Cebuano
- Chichewa
- Corsican
- Croatian
- Dutch
- Estonian
- Filipino
- Finnish
- Frisian
- Galician
- Georgian
- Gujarati
- Haitian
- Hausa
- Hawaiian
- Hebrew
- Hmong
- Hungarian
- Icelandic
- Igbo
- Javanese
- Kannada
- Kazakh
- Khmer
- Kurdish
- Kyrgyz
- Latin
- Latvian
- Lithuanian
- Luxembou..
- Macedonian
- Malagasy
- Malay
- Malayalam
- Maltese
- Maori
- Marathi
- Mongolian
- Burmese
- Nepali
- Norwegian
- Pashto
- Persian
- Punjabi
- Serbian
- Sesotho
- Sinhala
- Slovak
- Slovenian
- Somali
- Samoan
- Scots Gaelic
- Shona
- Sindhi
- Sundanese
- Swahili
- Tajik
- Tamil
- Telugu
- Thai
- Ukrainian
- Urdu
- Uzbek
- Vietnamese
- Welsh
- Xhosa
- Yiddish
- Yoruba
- Zulu
- Kinyarwanda
- Tatar
- Oriya
- Turkmen
- Uyghur


To use a digital torque wrench, confirm the joint’s tightening requirement, select a suitable wrench and attachment, then check the unit, target and measurement mode before applying load. Tighten smoothly from the specified grip position, stop at the required indication, and identify the reading from that tightening cycle. A number on the screen may be a target, a live measurement, a held peak or a recalled result; these do not mean the same thing.
The exact power-on, zeroing and memory controls depend on the model. The workflow below explains what to check at each stage, so you can follow the selected wrench’s instructions without confusing a saved setting with a completed tightening result.
Confirm the Joint Requirement Before Setting the Wrench
Identify the Fastener, Torque Value and Assembly Conditions
Start with the assembly instructions for the exact fastener and component. Record the torque value together with its unit, and check whether the instruction specifies a final target, an acceptable range, several tightening stages or an additional angle operation. A torque-only procedure does not complete a joint instruction that also requires angle tightening.
Keep the assembly conditions with that value: the correct fastener and washer, thread condition, specified lubricant or coating, where it is applied, and which part is turned. Friction affects the relationship between applied torque and bolt tension. Adding lubricant to a joint specified for a different condition can change the result even when the wrench displays the same torque. Do not invent a percentage reduction to compensate.
For several fasteners securing one component, follow the specified sequence and stages. If the final requirement is 20 N·m after an earlier tightening stage, the final target is not calculated by subtracting the earlier torque. Torque settings describe the required condition at that stage; they are not quantities to add together across successive pulls.
Check That the Wrench and Attachment Suit the Task
Match the target to the exact model’s documented working range, applicable accuracy conditions and measurement direction. A reversible ratchet does not, by itself, establish the wrench’s accuracy in both directions. Also check that the socket or bit fits the fastener fully and that the drive connection is suitable.
YOUBAR’s digital torque wrench range provides several product options. Compare the selected model with the actual task rather than choosing only by its maximum capacity. Include the available handle clearance and the position from which the display can be read.
Start the Wrench Unloaded and Check Its Ready State
Inspect the drive, ratchet, housing and attachment before use. Start the wrench without applying torque and keep it stable during the model’s startup or zeroing procedure. Check the battery status and any error indication before putting the tool under load. An unresolved warning should be investigated, not hidden by repeatedly restarting the wrench.
Next, identify what the screen is showing. A displayed target can remain nonzero while no torque is applied. It is the actual unloaded measurement reference, where displayed, that matters when checking zero—not every number visible on the screen.
Separate Zeroing, Function Checks and Calibration
| Check | What it establishes | What it does not establish |
|---|---|---|
| Unloaded zeroing | The reference used before measuring applied torque. | Accuracy throughout the working range. |
| An ordinary function check | Whether the relevant display, controls and supported indications respond as described in the instructions. | Agreement with a known torque reference. |
| Calibration | How the tool’s indication compares with an appropriate reference under defined conditions. | That a joint has been assembled correctly merely because this tool was used. |
A wrench can return to zero and still have an error under load. Pressing a zero key or tightening a convenient bolt is therefore not a substitute for calibration. Adjustment, if required, is a separate operation from finding and documenting the measurement error.
Set the Unit, Target and Measurement Mode
Verify the Active Unit and Target Together
Read the unit beside the value before confirming the target. N·m, lbf·ft and lbf·in are different units; entering the same number after changing units does not preserve the same torque. Where conversion is necessary, verify the converted value and the rounding appropriate to the work instruction.
If you select a stored preset, inspect the value it loads. A preset name is not proof that it matches the next fastener. Likewise, a control lock can help prevent accidental changes after setup, but it cannot correct a wrong unit or target that was already entered.
Understand Presets, Live Torque, Peak Torque and Stored Results
YOUBAR’s ratchet digital torque wrench listing identifies PEAK and TRACK modes, P0–P9 torque presets, a setting lock, audible and visual indications, and data storage. The ten presets are target settings; they should not be interpreted as a ten-result measurement memory.
| Information | How to interpret it | Common mistake |
|---|---|---|
| Target | The torque requested for the operation. | Treating it as evidence that torque has been applied. |
| Live or TRACK reading | The measured torque at that point during loading. | Assuming a reading seen partway through the pull is the final result. |
| PEAK reading | The highest torque detected during the relevant measurement cycle. | Assuming it must equal the target or show the torque remaining in the joint. |
| Stored result | A measurement retained according to the tool’s recording rules. | Assuming every displayed peak has automatically been saved. |
| Target preset | A setting that can be selected again for another task. | Confusing a saved setpoint with a saved tightening result. |
Select the mode needed for the job and establish how to identify the current cycle’s result before starting. Also distinguish any approach warning from the final target indication. Do not assume a particular warning percentage, color sequence or memory action unless it is specified for the selected model.
Position the Tool and Apply Torque Smoothly
Maintain Proper Engagement and the Specified Grip
Seat the socket or bit fully and keep it aligned with the fastener. Use the grip area specified for the wrench, and arrange the working position so that the handle can move without striking an obstruction. Poor engagement or awkward access can cause the attachment to slip just when controlled movement matters most.
Before final tightening, start the fastener by hand where the assembly procedure allows and confirm correct thread engagement. If it binds unexpectedly, stop and investigate instead of forcing it into place with the wrench.
Apply force gradually and smoothly. Avoid jerking the handle or adding an unapproved handle extension. If an attachment changes the effective lever length, check the required configuration or torque correction before use. A connection that physically fits is not sufficient evidence that an offset arrangement will deliver the requested torque.
Stop at the Required Signal Without Chasing Repeated Alerts
As the target approaches, maintain control of the pull and respond to the indication specified in the wrench instructions. Do not assume an electronic warning mechanically prevents further torque from being applied. Continuing to pull after the required signal can raise the recorded peak above the target.
Release the load in a controlled manner and inspect the result. Repeatedly pulling until the wrench sounds again creates additional loading events; it does not reconstruct the first tightening event. This is different from a component manufacturer’s prescribed sequence, staged tightening or approved recheck procedure, which should still be followed.
Interpret the Final Reading Before Judging the Result
Identify the Reading From the Current Cycle
After releasing the load, determine whether the display shows the current peak, the selected target, a live value returning toward zero or a recalled record. If the screen changes after a short interval, use the model’s stated method to retrieve the result. Do not attribute a previous fastener’s reading to the one just tightened.
A tightening peak records what the wrench detected during that operation. It does not directly measure bolt tension, prove correct thread engagement or confirm that the right washer and lubricant were used. Those assembly checks remain part of the process.
Compare the Result With the Joint’s Acceptance Requirements
The wrench’s accuracy specification and the joint’s acceptance limits answer different questions. Accuracy describes measurement performance under stated conditions. The joint instruction defines the required assembly outcome. An accuracy figure is not an extra allowance that can be added to the assembly’s permitted range.
In this hypothetical example, assume the selected tool is suitable for the stated values and direction. The numbers illustrate display states rather than a torque specification for a real component.
| Stage | Displayed value | Meaning |
|---|---|---|
| Before loading | Target: 20.0 N·m | The requested setting, with no tightening result yet. |
| During loading | Live reading: 18.2 N·m | The torque measured at that instant. |
| After release | Cycle peak: 20.7 N·m | The observed peak to retain if the process requires that measurement. |
| Next, different task | Required target: 8.0 N·m | A new requirement that needs a fresh suitability and settings check. |
This example provides no joint acceptance limits, so 20.7 N·m cannot be declared acceptable or unacceptable from these numbers alone. Do not replace that observed result with the 20.0 N·m target in a record. If the actual joint requirement has been exceeded, follow the applicable inspection or rework procedure rather than simply loosening and retightening without checking it.
Check Unexpected Readings Before Continuing
Stop loading before investigating a surprising result. First identify the display state, then check the unit, target or preset, mode, working range and direction. Examine attachment seating and any battery or error indication before concluding that the sensor is faulty.
| Observation | First check | Practical response |
|---|---|---|
| A nonzero number remains after release | Is it a target, held peak or recalled result? | Identify the screen state before attempting to re-zero. |
| The recorded peak is higher than expected | Unit, target, current-cycle identity and loading technique. | Assess the joint against its actual requirements; changing the target does not change the completed operation. |
| The value seems implausible | Mode, range, measurement direction and attachment arrangement. | Resolve the mismatch before another tightening attempt. |
| A peak appeared but no record can be found | The model’s saving conditions and memory status. | Check whether recording occurred; do not assume the displayed peak was retained. |
| The actual unloaded measurement remains abnormal | The approved zeroing procedure and the tool’s condition. | If the problem persists, remove the wrench from the job for appropriate checking. |
These checks are a general troubleshooting order, not a substitute for model-specific fault instructions. A suspected overload, drop or persistent error deserves investigation even if restarting temporarily clears the display.
Preserve the Required Result and Prepare the Next Fastener
Separate Saving, Recalling and Deleting Data
When records are required, establish how a measurement is saved and confirm that the record belongs to the correct task. YOUBAR lists data storage for its ratchet digital wrench; the recording trigger, capacity, retention and memory-full behavior should be confirmed for the supplied model before that feature is relied on for job records.
A practical manual record can identify the component or fastener, tool, target and unit, observed result, direction, and any abnormal condition or follow-up action. This is a suggested work-record structure, not a claim that the wrench automatically captures those fields.
Recalling a result, preparing a new measurement and deleting stored data are separate actions. Preserve any required evidence before clearing records. There is no universal rule that every fastener must be followed by a memory-delete command.
Recheck Settings When the Job Changes
Before moving to another task, verify the target and unit again, along with the mode, direction, attachment and usable range. Return the tool to its measurement-ready state using the model’s method. A previously displayed peak must not become the apparent result for a fastener that has not yet been tightened.
Store the Wrench and Recognize When Verification Is Needed
After work, clean and protect the tool as its instructions specify, store it dry in suitable protection, and follow the stated battery guidance. Do not automatically apply a spring-loaded mechanical wrench’s storage-setting procedure to a digital model.
Use the manufacturer’s requirements and the applicable quality process to determine verification or calibration needs. A drop, suspected overload or persistent abnormal reading can require checking before the normal scheduled interval. Neither a clear screen nor a successful restart proves that measurement performance is unchanged.
Using a digital torque wrench well means connecting the correct joint requirement to a controlled pull and an identifiable result. To discuss a YOUBAR tool for a specific job, send the application and torque requirements to YOUBAR, including the target range, tightening direction, drive or attachment, and any recording needs. Those details help define what must be confirmed for the selected model before it is put to work.
Previous News
Choosing a Digital Torque Wrench for Bicycle Ma...Next News
How to Choose a Digital Torque Wrench for 0–10 ...Feature Product
-
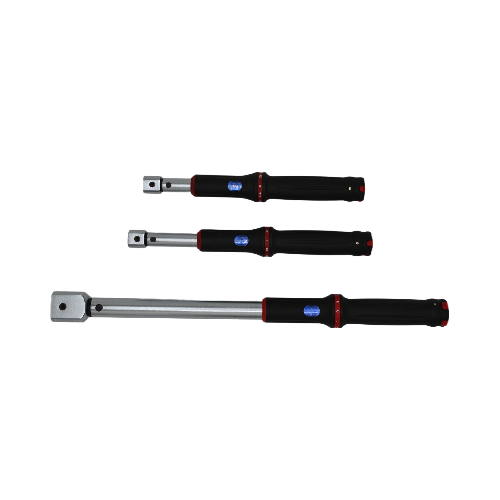 XS Series Interchangeable Head Window Style Cli...
TENGTUO ELECTRONIC TECHNOLOGY Item NO...
-
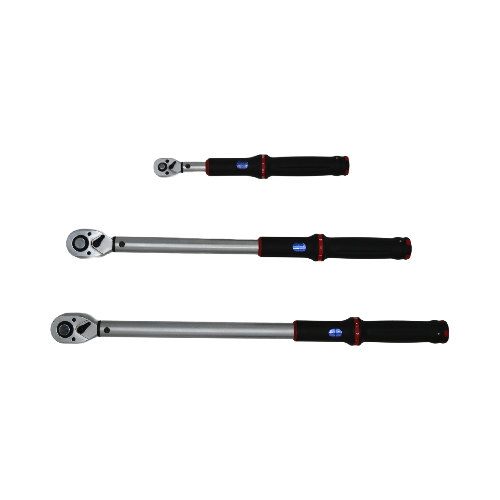 XS Series Window Style Click Torque Wrench
TENGTUO ELECTRONIC TECHNOLOGY Item NO...
-
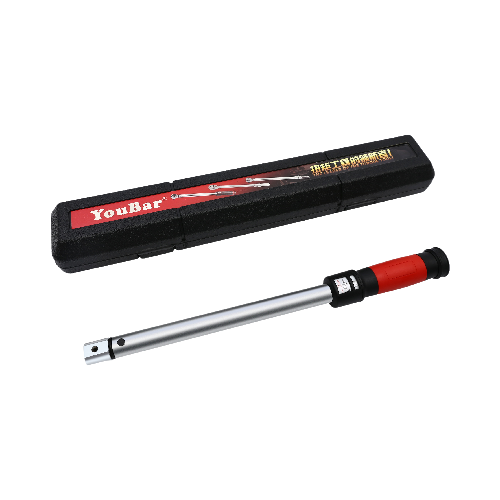 SL Series Interchangeable Head Window Style Cli...
TENGTUO ELECTRONIC TECHNOLOGY item NO...